
외로운 Nova의 작업실
Assembly 언어 공부 - 9(demo5,6,7) 본문
안녕하세요. 오늘은 지난시간에 이어 demo5 코드 리뷰를 해보도록 하겠습니다.
<demo5>
먼저 demo5 파일을 열어줍니다.
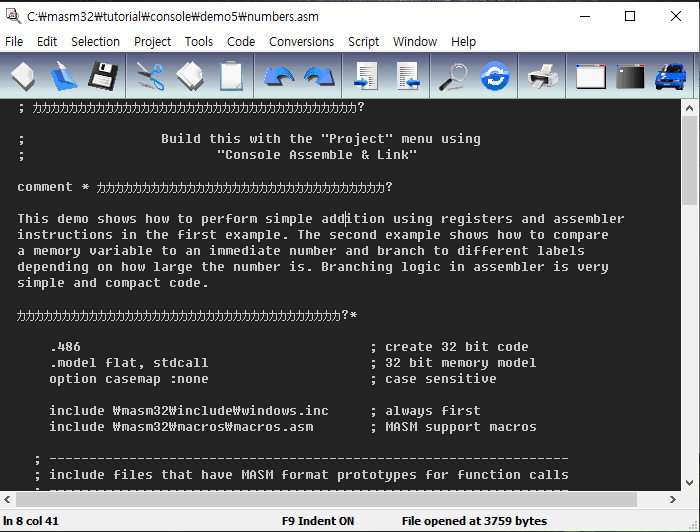
코드를 긁어와 보겠습니다.
; カカカカカカカカカカカカカカカカカカカカカカカカカカカカカカカカカカカカ?

;                 Build this with the "Project" menu using
;                        "Console Assemble & Link"

comment * カカカカカカカカカカカカカカカカカカカカカカカカカカカカカカカカ?

This demo shows how to perform simple addition using registers and assembler
instructions in the first example. The second example shows how to compare
a memory variable to an immediate number and branch to different labels
depending on how large the number is. Branching logic in assembler is very
simple and compact code.

カカカカカカカカカカカカカカカカカカカカカカカカカカカカカカカカカカカカ?*

    .486                                    ; create 32 bit code
    .model flat, stdcall                    ; 32 bit memory model
    option casemap :none                    ; case sensitive

    include \masm32\include\windows.inc     ; always first
    include \masm32\macros\macros.asm       ; MASM support macros

  ; -----------------------------------------------------------------
  ; include files that have MASM format prototypes for function calls
  ; -----------------------------------------------------------------
    include \masm32\include\masm32.inc
    include \masm32\include\gdi32.inc
    include \masm32\include\user32.inc
    include \masm32\include\kernel32.inc

  ; ------------------------------------------------
  ; Library files that have definitions for function
  ; exports and tested reliable prebuilt code.
  ; ------------------------------------------------
    includelib \masm32\lib\masm32.lib
    includelib \masm32\lib\gdi32.lib
    includelib \masm32\lib\user32.lib
    includelib \masm32\lib\kernel32.lib

    .code                       ; Tell MASM where the code starts

; カカカカカカカカカカカカカカカカカカカカカカカカカカカカカカカカカカカカ?

start:                          ; The CODE entry point to the program

    call main                   ; branch to the "main" procedure

    exit

; カカカカカカカカカカカカカカカカカカカカカカカカカカカカカカカカカカカカ?

main proc

    LOCAL var1:DWORD            ; space for a DWORD variable
    LOCAL str1:DWORD            ; a string handle for the input data

  ; test the MOV and ADD instructions

    mov eax, 100                ; copy the IMMEDIATE number 100 into the EAX register
    mov ecx, 250                ; copy the IMMEDIATE number 250 into the ECX register
    add ecx, eax                ; ADD EAX to ECX
    print str$(ecx)             ; show the result at the console
    print chr$(13,10,13,10)

  ; ----------------------------------------
  ; The two following macros can be combined
  ; once you are familiar with how they work
  ; ----------------------------------------
 ;     mov str1, input("Enter a number : ")
 ;     mov var1, sval(str1)        ; convert the result to a signed integer

    mov var1, sval(input("Enter a number : "))

    cmp var1, 100               ; compare the variable to the immediate number 100
    je equal                    ; jump if var1 is equal to 100 to "equal"
    jg bigger                   ; jump if var1 is greater than 100 to "bigger"
    jl smaller                  ; jump if var1 is less than 100 to "smaller"

  equal:
    print chr$("The number you entered is 100",13,10)
    jmp over

  bigger:
    print chr$("The number you entered is greater than 100",13,10)
    jmp over

  smaller:
    print chr$("The number you entered is smaller than 100",13,10)

  over:

    ret

main endp

; カカカカカカカカカカカカカカカカカカカカカカカカカカカカカカカカカカカカ?

end start                       ; Tell MASM where the program ends
한국어로 번역해보도록 하겠습니다.
; カカカカカカカカカカカカカカカカカカカカカカカカカカカカカカカカカカカカ?

;                 프로젝트 메뉴에 있는 콘솔 어셈블리와
;                        링크를 사용하여 빌드하세요.

comment * カカカカカカカカカカカカカカカカカカカカカカカカカカカカカカカカ?

이 데모에서는 첫 번째 예에서는 레지스터 및 어셈블러 명령을 사용하여 단순 추
가를 수행하는 방법을 보여 줍니다. 두 번째 예는 메모리 변수를 즉시 숫자와 비교
하고 숫자의 크기에 따라 다른 레이블로 분기하는 방법을 보여줍니다. 어셈블러
에서 분기 논리는 매우 간단하고 컴팩트한 코드입니다.

カカカカカカカカカカカカカカカカカカカカカカカカカカカカカカカカカカカカ?*

    .486                                    ; 32비트 코드를 사용합니다.
    .model flat, stdcall                    ; 32 bit 메모리 모델을 사용합니다.
    option casemap :none                    ; 대소문자를 구별합니다.

    include \masm32\include\windows.inc     ; 항상 처음에 써줍니다.
    include \masm32\macros\macros.asm       ; MASM 메크로입니다.

  ; -----------------------------------------------------------------
  ; 함수 호출을 위한 MASM 형식 프로토타입을 포함하는 파일
  ; -----------------------------------------------------------------
    include \masm32\include\masm32.inc
    include \masm32\include\gdi32.inc
    include \masm32\include\user32.inc
    include \masm32\include\kernel32.inc

  ; ------------------------------------------------
  ; 함수에 대한 정의가 있고 신뢰할 수 있는 사전 빌드 코드를
  ; 테스트한 라이브러리 파일입니다.
  ; ------------------------------------------------
    includelib \masm32\lib\masm32.lib
    includelib \masm32\lib\gdi32.lib
    includelib \masm32\lib\user32.lib
    includelib \masm32\lib\kernel32.lib

    .code                       ; MASM에게 코드의 시작점을 알려줍니다.

; カカカカカカカカカカカカカカカカカカカカカカカカカカカカカカカカカカカカ?

start:                          ; 프로그램의 엔트리 포인트 코드입니다.

    call main                   ; main프로시저로 분기합니다.

    exit

; カカカカカカカカカカカカカカカカカカカカカカカカカカカカカカカカカカカカ?

main proc

    LOCAL var1:DWORD            ; DWORD 변수 공간을 할당합니다.
    LOCAL str1:DWORD            ; 입력 데이터의 문자열 핸들입니다.

  ; MOV 및 ADD 지침을 테스트합니다.

    mov eax, 100                ; EAX 레지스터에 바이트코드 100을 복사합니다.
    mov ecx, 250                ; ECX 레지스터에 바이트코드 250을 복사합니다.
    add ecx, eax                ; EAX의 값을 ECX에 더하고난뒤 ECX에 저장합니다.
    print str$(ecx)             ; 값이 어떤지 콘솔에 표시해줍니다.
    print chr$(13,10,13,10)

  ; ----------------------------------------
  ; 다음 두 매크로는 작동 방식에 익숙해지면
  ; 결합할 수 있습니다.
  ; ----------------------------------------
 ;     mov str1, input("Enter a number : ")
 ;     mov var1, sval(str1)        ; 입력된 결과는 부호있는 정수로 변환합니다.

    mov var1, sval(input("Enter a number : "))

    cmp var1, 100               ; 바이트코드로 저장된 100과 var1 변수의 값을 비교합니다.
    je equal                    ; var1이 100과 같다면, equal 레이블로 점프합니다.
    jg bigger                   ; val1이 100보다 크다면(greater), bigger 레이블로 점프합니다.
    jl smaller                  ; val1이 100보다 작다면(lower), smaller 레이블로 점프합니다.

  equal:
    print chr$("The number you entered is 100",13,10)
    jmp over					;over 레이블로 점프합니다.

  bigger:
    print chr$("The number you entered is greater than 100",13,10)
    jmp over					;over 레이블로 점프합니다.

  smaller:
    print chr$("The number you entered is smaller than 100",13,10)

  over:

    ret

main endp

; カカカカカカカカカカカカカカカカカカカカカカカカカカカカカカカカカカカカ?

end start                       ; MASM에게 코드의 끝을 알려줍니다.
위 코드를 주석과 함께 천천히 읽으신다면, 첫번째 코드에서는 레지스터를 이용하여 숫자를 더하는 코드를 이해하실 수 있습니다. 두번째 코드에서는 cmp와 je, jg, jl 문에대해서 이해하실 수 잇을겁니다.
실제로 실행시켜보도록 하겠습니다.
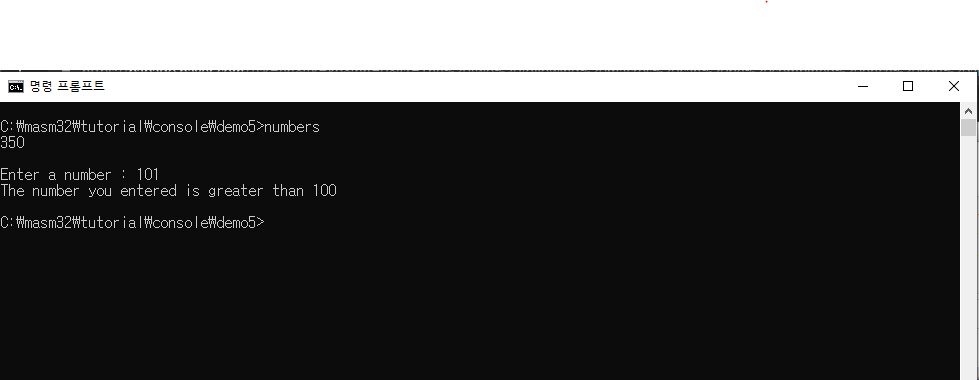
첫번째 코드의 연산결과(100+250) 이 콘솔에 출력된것을 확인 할 수 있습니다. 두번째 코드의 입력값을 101로 줫더니 jg분기문이 작동하여서 The number you entered is greater than 100 이 출력된 것을 확인 할 수 있습니다.
<demo6>
demo5에 이어서 이번에는 demo6를 리뷰해보겠습니다.
먼저 demo6 파일에 들어잇는 address.asm파일을 MASM Editor로 열어줍니다.
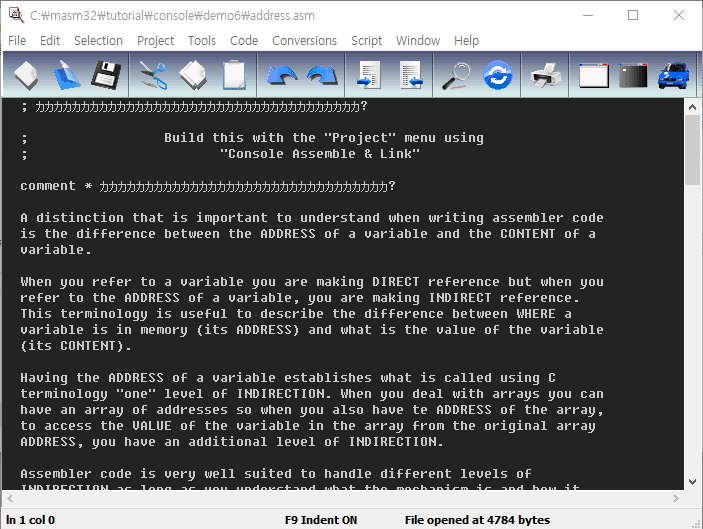
코드를 한번 긁어와 보겠습니다.
; カカカカカカカカカカカカカカカカカカカカカカカカカカカカカカカカカカカカ?

;                 Build this with the "Project" menu using
;                        "Console Assemble & Link"

comment * カカカカカカカカカカカカカカカカカカカカカカカカカカカカカカカカ?

A distinction that is important to understand when writing assembler code
is the difference between the ADDRESS of a variable and the CONTENT of a
variable.

When you refer to a variable you are making DIRECT reference but when you
refer to the ADDRESS of a variable, you are making INDIRECT reference.
This terminology is useful to describe the difference between WHERE a
variable is in memory (its ADDRESS) and what is the value of the variable
(its CONTENT).

Having the ADDRESS of a variable establishes what is called using C
terminology "one" level of INDIRECTION. When you deal with arrays you can
have an array of addresses so when you also have te ADDRESS of the array,
to access the VALUE of the variable in the array from the original array
ADDRESS, you have an additional level of INDIRECTION.

Assembler code is very well suited to handle different levels of
INDIRECTION as long as you understand what the mechanism is and how it
works. The reason why the technique of using levels of INDIRECTION is
so useful is that a single DWORD address can access a much larger
number of variables and do it very quickly.

カカカカカカカカカカカカカカカカカカカカカカカカカカカカカカカカカカカカ?*

    .486                                    ; create 32 bit code
    .model flat, stdcall                    ; 32 bit memory model
    option casemap :none                    ; case sensitive

    include \masm32\include\windows.inc     ; always first
    include \masm32\macros\macros.asm       ; MASM support macros

  ; -----------------------------------------------------------------
  ; include files that have MASM format prototypes for function calls
  ; -----------------------------------------------------------------
    include \masm32\include\masm32.inc
    include \masm32\include\gdi32.inc
    include \masm32\include\user32.inc
    include \masm32\include\kernel32.inc

  ; ------------------------------------------------
  ; Library files that have definitions for function
  ; exports and tested reliable prebuilt code.
  ; ------------------------------------------------
    includelib \masm32\lib\masm32.lib
    includelib \masm32\lib\gdi32.lib
    includelib \masm32\lib\user32.lib
    includelib \masm32\lib\kernel32.lib

    .data
    ; --------------------------
    ; initialise 10 DWORD values
    ; --------------------------
      itm0  dd 0
      itm1  dd 1
      itm2  dd 2
      itm3  dd 3
      itm4  dd 4
      itm5  dd 5
      itm6  dd 6
      itm7  dd 7
      itm8  dd 8
      itm9  dd 9
    ; ---------------------------------
    ; put their addresses into an array
    ; ---------------------------------
      array dd itm0,itm1,itm2,itm3,itm4
            dd itm5,itm6,itm7,itm8,itm9

    .code                       ; Tell MASM where the code starts

; カカカカカカカカカカカカカカカカカカカカカカカカカカカカカカカカカカカカ?

start:                          ; The CODE entry point to the program

    call main                   ; branch to the "main" procedure

    exit

; カカカカカカカカカカカカカカカカカカカカカカカカカカカカカカカカカカカカ?

main proc

    LOCAL cnt   :DWORD          ; allocate a loop counter

    push esi
    push edi

    mov cnt, 10                 ; set the number of loop iterations
    mov esi, array              ; put array address into ESI

  label1:
  ; --------------------------------------------------------
  ; The following line of code is how you remove 1 level
  ; of indirection from an ADDRESS. The technique is called
  ; DEREFERENCING. By enclosing ESI in square brackets it
  ; becomes a MEMORY OPERAND that is the actual data AT the
  ; ADDRESS in ESI.
  ; --------------------------------------------------------
    mov edi, [esi]              ; dereference it into EDI
    print str$(esi)             ; display the address of the value
    print chr$(" = address in memory",13,10)
    print str$(edi)             ; display the dereferenced value
    print chr$("       = content of address",13,10,13,10)
    add esi, 4                  ; add 4 to ESI to get next array item
    sub cnt, 1                  ; subtract 1 from the counter
    jnz label1                  ; jump back to label1 in cnt not zero

    pop edi
    pop esi

    ret

main endp

; カカカカカカカカカカカカカカカカカカカカカカカカカカカカカカカカカカカカ?

end start                       ; Tell MASM where the program ends
한글로 번역해보겠습니다.
; カカカカカカカカカカカカカカカカカカカカカカカカカカカカカカカカカカカカ?

;                 프로젝트 메뉴에서 콘솔 어셈블리와 링크를
;                        사용해서 빌드하세요.

comment * カカカカカカカカカカカカカカカカカカカカカカカカカカカカカカカカ?

어셈블러 코드를 작성할 때 이해해야 할 중요한 구분은 변수의 주소와
변수의 내용 간의 차이를 구분하는 것 입니다.

변수를 참조할 때는 직접 참조하지만
변수의 주소를 참조할 때는 간접 참조를 합니다.
이 용어는 변수가 메모리에 있는 위치(주소)와
변수의 값(내용) 사이의 차이를 설명하는 데 유용합니다.

변수의 주소를 갖는 것은 C 용어의 "하나" 수준의 참조를
사용하여 불러오는 것으로 정의합니다.
배열을 처리할 때 주소 배열을 가질 수 있으므로,
배열의 주소도 있어야 할 때 원래 배열 주소에서
배열의 변수 값에 액세스할 수 있습니다.

어셈블러 코드는 메커니즘이 무엇이고 어떻게 작동하는지
이해하는 한 다양한 수준의 간접 참조를 처리하는 데 매우 적합합니다.
간접 참조 수준을 사용하는 기술이 매우 유용한 이유는
단일 DWORD 주소가 훨씬 더 많은 변수에 액세스하여
매우 빠르게 수행할 수 있기 때문입니다.

カカカカカカカカカカカカカカカカカカカカカカカカカカカカカカカカカカカカ?*

    .486                                    ; 32비트 코드를 만듭니다.
    .model flat, stdcall                    ; 32 bit 메모리 모델입니다.
    option casemap :none                    ; 대소문자를 구분합니다.

    include \masm32\include\windows.inc     ; 항상 처음에 써줍니다.
    include \masm32\macros\macros.asm       ; MASM를 도와주는 메크로입니다.

  ; -----------------------------------------------------------------
  ; 함수 호출을 위한 MASM 형식 프로토타입을 포함하는 파일
  ; -----------------------------------------------------------------
    include \masm32\include\masm32.inc
    include \masm32\include\gdi32.inc
    include \masm32\include\user32.inc
    include \masm32\include\kernel32.inc

  ; ------------------------------------------------
  ; 함수에 대한 정의가 있고 신뢰할 수 있는
  ; 사전 빌드 코드를 테스트한 라이브러리 파일입니다.
  ; ------------------------------------------------
    includelib \masm32\lib\masm32.lib
    includelib \masm32\lib\gdi32.lib
    includelib \masm32\lib\user32.lib
    includelib \masm32\lib\kernel32.lib

    .data
    ; --------------------------
    ; 10개의 DWORD 값을 초기화합니다.
    ; --------------------------
      itm0  dd 0
      itm1  dd 1
      itm2  dd 2
      itm3  dd 3
      itm4  dd 4
      itm5  dd 5
      itm6  dd 6
      itm7  dd 7
      itm8  dd 8
      itm9  dd 9
    ; ---------------------------------
    ; 그들의 주소를 배열에 넣습니다.
    ; ---------------------------------
      array dd itm0,itm1,itm2,itm3,itm4
            dd itm5,itm6,itm7,itm8,itm9

    .code                       ; MASM에게 코드의 시작점을 알려줍니다.

; カカカカカカカカカカカカカカカカカカカカカカカカカカカカカカカカカカカカ?

start:                          ; 프로그램의 엔트리 포인트 코드입니다.

    call main                   ; main 프로시저로 분기합니다.

    exit

; カカカカカカカカカカカカカカカカカカカカカカカカカカカカカカカカカカカカ?

main proc

    LOCAL cnt   :DWORD          ; 반복 카운터에 메모리를 할당합니다.

    push esi
    push edi

    mov cnt, 10                 ; 반복 카운터에는 10 복사합니다.
    mov esi, array              ; esi에 array의 값인 배열의 주소를 복사합니다.

  label1:
  ; --------------------------------------------------------
  ; 다음 코드 행은 주소에서 1단계 간접 참조를 제거하는 방법입니다.
  ; 이 기술은 역참조라고 불립니다.
  ; ESI를 대괄호로 둘러싸면 메모리 피연산자가 됩니다.
  ; 이 피연산자는 ESI의 주소에 있는 실제 데이터입니다. //
  ; --------------------------------------------------------
    mov edi, [esi]              ; esi에 들어있는 주소로 가서 그 값을 edi에 복사합니다.(esi 역참조)
    print str$(esi)             ; 주소를 보여줍니다.
    print chr$(" = address in memory",13,10)
    print str$(edi)             ; 주소에 있는 값을 보여줍니다.
    print chr$("       = content of address",13,10,13,10)
    add esi, 4                  ; 다음 배열에 접근하기위해 esi(배열의주소)에 4를 더해줍니다.(dword는 4byte이기때문)
    sub cnt, 1                  ; 반복 카운터에서 1을 빼줍니다.
    jnz label1                  ; 바로 전의 변수 cnt의 값이 0이 아니라면 label1레이블로 점프합니다.

    pop edi
    pop esi

    ret

main endp

; カカカカカカカカカカカカカカカカカカカカカカカカカカカカカカカカカカカカ?

end start                       ; MASM에게 프로그램의 끝을 알려줍니다.
위 코드를 주석과 함께 읽고나면 변수를 이용하여 그 값을 활용하거나 간접 참조를 활용하는 방법을 알게됩니다. 좀더 자세히 설명하자면 esi = 0x00000011 의 값이 들어있고 주소 0x00000011에 3이 들어있다고 합시다. esi의 값은 0x00000011 입니다. 하지만, esi의 간접참조의 값은 3입니다. 이를 기호로 표현하면 esi의 값은 esi = 0x00000011, [esi] = 3 이라는 뜻입니다.
또한 각 주소마다 1바이트씩 기록되므로 주소에 +4를 한다는건 4바이트의값을 하나 뛰어넘는다는 것입니다. 예를들어 0x00000011부터 DWORD 배열로 1,2를 기록하면, 0x00000011~0x00000014까지 숫자1을 기록하고, 0x00000015~0x00000018까지 숫자 2를 기록한다는 뜻입니다.
따라서 해당 프로그램을 실행하게되면 0부터9까지 주소와 함계 콘솔에 출력될것입니다.
그럼 직접 실행시켜보겠습니다.
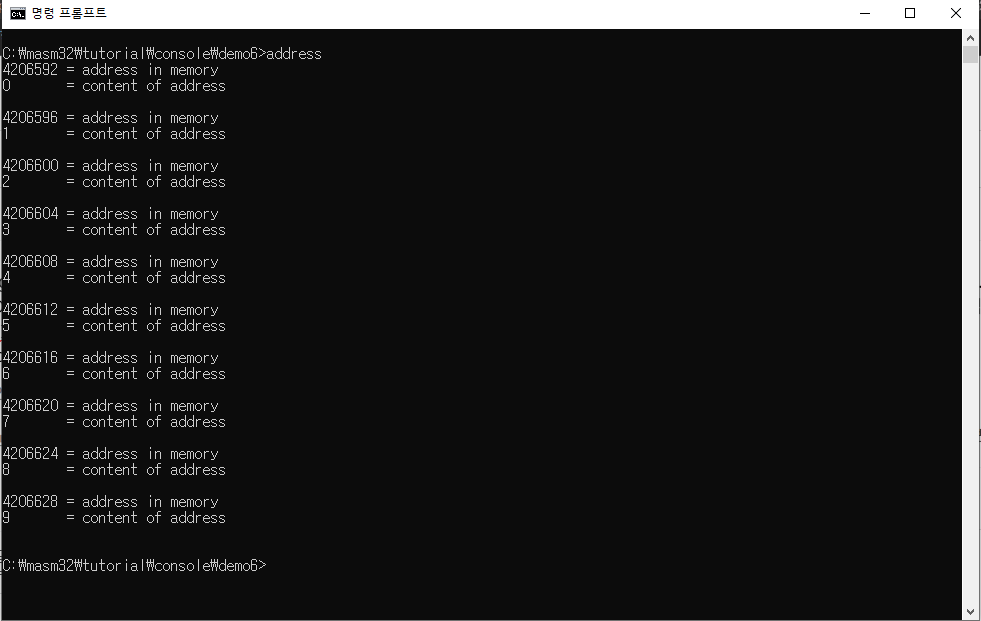
직접보면 이해가 잘 될거라고 믿습니다.
<demo7>
이번에는 demo6에 이어서 demo7도 봐보겠습니다.
먼저 demo7을 MASM Code Editor로 열어줍시다.
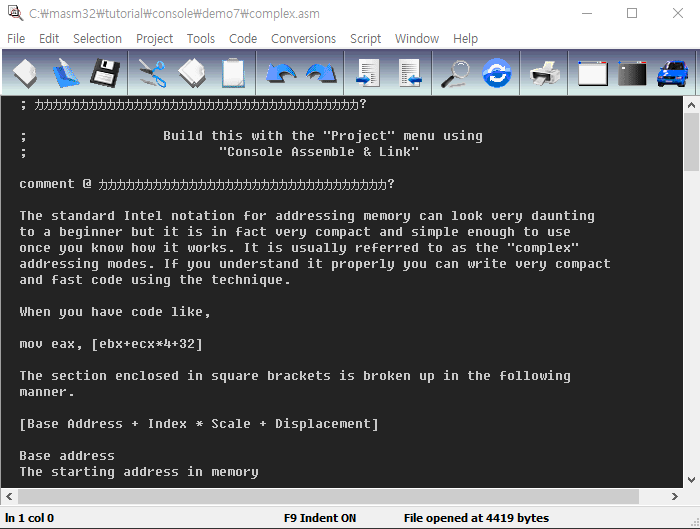
코드를 긁어와보겠습니다.
; カカカカカカカカカカカカカカカカカカカカカカカカカカカカカカカカカカカカ?

;                 Build this with the "Project" menu using
;                        "Console Assemble & Link"

comment @ カカカカカカカカカカカカカカカカカカカカカカカカカカカカカカカカ?

The standard Intel notation for addressing memory can look very daunting
to a beginner but it is in fact very compact and simple enough to use
once you know how it works. It is usually referred to as the "complex"
addressing modes. If you understand it properly you can write very compact
and fast code using the technique.

When you have code like,

mov eax, [ebx+ecx*4+32]

The section enclosed in square brackets is broken up in the following
manner.

[Base Address + Index * Scale + Displacement]

Base address
The starting address in memory

Index
A 32 bit register which is the variable for changing the address

Scale
The data size being worked on, it can be 1, 2, 4 or 8

Displacement
An optional additional offset to change the address by.

The example below will show how it works.

カカカカカカカカカカカカカカカカカカカカカカカカカカカカカカカカカカカカ?@

    .486                                    ; create 32 bit code
    .model flat, stdcall                    ; 32 bit memory model
    option casemap :none                    ; case sensitive

    include \masm32\include\windows.inc     ; always first
    include \masm32\macros\macros.asm       ; MASM support macros

  ; -----------------------------------------------------------------
  ; include files that have MASM format prototypes for function calls
  ; -----------------------------------------------------------------
    include \masm32\include\masm32.inc
    include \masm32\include\gdi32.inc
    include \masm32\include\user32.inc
    include \masm32\include\kernel32.inc

  ; ------------------------------------------------
  ; Library files that have definitions for function
  ; exports and tested reliable prebuilt code.
  ; ------------------------------------------------
    includelib \masm32\lib\masm32.lib
    includelib \masm32\lib\gdi32.lib
    includelib \masm32\lib\user32.lib
    includelib \masm32\lib\kernel32.lib

    .data
    ; --------------------------
    ; initialise 10 DWORD values
    ; --------------------------
      itm0  dd 0
      itm1  dd 1
      itm2  dd 2
      itm3  dd 3
      itm4  dd 4
      itm5  dd 5
      itm6  dd 6
      itm7  dd 7
      itm8  dd 8
      itm9  dd 9
    ; ---------------------------------
    ; put their addresses into an array
    ; ---------------------------------
      array dd itm0,itm1,itm2,itm3,itm4
            dd itm5,itm6,itm7,itm8,itm9

    .code                       ; Tell MASM where the code starts

; カカカカカカカカカカカカカカカカカカカカカカカカカカカカカカカカカカカカ?

start:                          ; The CODE entry point to the program

    call main                   ; branch to the "main" procedure

    exit

; カカカカカカカカカカカカカカカカカカカカカカカカカカカカカカカカカカカカ?

main proc

    LOCAL cnt   :DWORD          ; allocate a loop counter

    push ebx
    push esi
    push edi

    mov cnt, 10                 ; set the number of loop iterations

    mov ebx, array              ; put BASE ADDRESS of array in EBX
    xor esi, esi                ; Use ESI as INDEX and set to zero

    print chr$("Index being changed",13,10)

  label2:
    mov edi, [ebx+esi*4]
    print str$(edi)
    print chr$(13,10)
    add esi, 1                  ; each array member is accessed by changing the INDEX
    sub cnt, 1
    jnz label2

    print chr$("Displacement being changed",13,10)

    xor esi, esi

    mov edi, [ebx+esi*4]        ; no displacement
    print str$(edi)
    print chr$(13,10)

    mov edi, [ebx+esi*4+4]      ; added displacement of 4 bytes
    print str$(edi)
    print chr$(13,10)

    mov edi, [ebx+esi*4+8]      ; added displacement of 8 bytes
    print str$(edi)
    print chr$(13,10)

    mov edi, [ebx+esi*4+12]     ; added displacement of 12 bytes
    print str$(edi)
    print chr$(13,10)


    pop edi
    pop esi
    pop ebx

    ret

main endp

; カカカカカカカカカカカカカカカカカカカカカカカカカカカカカカカカカカカカ?

end start                       ; Tell MASM where the program ends
이전과 마찬가지로 한글로 번역해보겠습니다.
; カカカカカカカカカカカカカカカカカカカカカカカカカカカカカカカカカカカカ?

;                 프로젝트 메뉴에 있는 콘솔 어셈블과 링크를
;                        사용해서 빌드하세요.

comment @ カカカカカカカカカカカカカカカカカカカカカカカカカカカカカカカカ?

메모리 주소 지정을 위한 표준 Intel 표기법은 초보자에게는 매우 어려워
보일 수 있지만 실제로 작동 방식을 알고 나면 사용할 수 있을 정도로 매우 작고 간단합니다.
일반적으로 "복잡한" 주소 지정 모드라고 합니다.
만약 여러분이 그것을 제대로 이해한다면,
여러분은 그 기술을 사용하여 매우 작고 빠른 코드를 작성할 수 있습니다.

만약 아래와 같은 코드가 있다면

mov eax, [ebx+ecx*4+32]

대괄호로 둘러싸인 부분은 다음과 같은 방법으로 구분됩니다.

[Base Address + Index * Scale + Displacement]

Base address
메모리의 시작 주소

Index
주소를 변경하는 변수인 32비트 레지스터(카운터)

Scale
작업 중인 데이터 크기는 1, 2, 4 또는 8일 수 있습니다(데이터의 크기)

Displacement
주소를 변경할 수 있는 선택적 추가 간격띄우기입니다.

아래 예에서는 작동 방식을 보여 줍니다.

カカカカカカカカカカカカカカカカカカカカカカカカカカカカカカカカカカカカ?@

    .486                                    ; 32비트 코드를 만듭니다.
    .model flat, stdcall                    ; 32 bit 메모리 모델입니다.
    option casemap :none                    ; 대소문자를 구별합니다.

    include \masm32\include\windows.inc     ; 항상 처음에 써줍니다.
    include \masm32\macros\macros.asm       ; MASM을 도와주는 메크로입니다.

  ; -----------------------------------------------------------------
  ; 함수 호출을 위한 MASM 형식 프로토타입을 포함하는 파일
  ; -----------------------------------------------------------------
    include \masm32\include\masm32.inc
    include \masm32\include\gdi32.inc
    include \masm32\include\user32.inc
    include \masm32\include\kernel32.inc

  ; ------------------------------------------------
  ; 함수에 대한 정의가 있고 신뢰할 수 있는 사전 빌드 코드를
  ; 테스트한 라이브러리 파일입니다.
  ; ------------------------------------------------
    includelib \masm32\lib\masm32.lib
    includelib \masm32\lib\gdi32.lib
    includelib \masm32\lib\user32.lib
    includelib \masm32\lib\kernel32.lib

    .data
    ; --------------------------
    ; 10개의 DWORD 값을 초기화합니다.
    ; --------------------------
      itm0  dd 0
      itm1  dd 1
      itm2  dd 2
      itm3  dd 3
      itm4  dd 4
      itm5  dd 5
      itm6  dd 6
      itm7  dd 7
      itm8  dd 8
      itm9  dd 9
    ; ---------------------------------
    ; 그들의 주소를 배열에 할당합니다.
    ; ---------------------------------
      array dd itm0,itm1,itm2,itm3,itm4
            dd itm5,itm6,itm7,itm8,itm9

    .code                       ; MASM에게 코드의 시작점을 알려줍니다.
; カカカカカカカカカカカカカカカカカカカカカカカカカカカカカカカカカカカカ?

start:                          ; 프로그램의 엔트리 포인트 코드입니다.

    call main                   ; main 프로시저로 분기합니다.

    exit

; カカカカカカカカカカカカカカカカカカカカカカカカカカカカカカカカカカカカ?

main proc

    LOCAL cnt   :DWORD          ; 루프카운터에 메모리공간을 할당합니다.

    push ebx
    push esi
    push edi

    mov cnt, 10                 ; 루프카운터에 10을 할당합니다.

    mov ebx, array              ; EBX에 배열의 시작주소를 할당합니다.
    xor esi, esi                ; ESI의 값을 0으로 초기화합니다.

    print chr$("Index being changed",13,10)

  label2:
    mov edi, [ebx+esi*4]
    print str$(edi)
    print chr$(13,10)
    add esi, 1                  ; Index가 바뀜에따라서 배열에 접근이 달라집니다.
    sub cnt, 1
    jnz label2

    print chr$("Displacement being changed",13,10)

    xor esi, esi

    mov edi, [ebx+esi*4]        ; 여기엔 displement가 없습니다.
    print str$(edi)
    print chr$(13,10)

    mov edi, [ebx+esi*4+4]      ; 4바이트의 displement를 추가합니다.
    print str$(edi)
    print chr$(13,10)

    mov edi, [ebx+esi*4+8]      ; 8바이트의 displement를 추가합니다.
    print str$(edi)
    print chr$(13,10)

    mov edi, [ebx+esi*4+12]     ; 12바이트의 displement를 추가합니다.
    print str$(edi)
    print chr$(13,10)


    pop edi
    pop esi
    pop ebx

    ret

main endp

; カカカカカカカカカカカカカカカカカカカカカカカカカカカカカカカカカカカカ?

end start                       ; MASM에게 코드의 끝을 알려줍니다.
위 코드를 주석과함께 읽게된다면 [base address + index * scale + displement]를 어떻게 사용하고 작동하는지 이해하셧을겁니다. base address는 예를 들어 배열의 시작 주소가 될 수 있고, index의경우 배열의 순서에서 몇번째 순서에 있는지가 될 수 있고, scale은 배열이 담는 변수의 크기가 될 수 있고, diplement는 우리가 직접 써줄 수 있는 선택적인 존재가 될 수있습니다.
출력은 label2에서 0부터 9까지 순서대로 출력되며 이후 1,2,3,4가 순서대로 출력됩니다. 직접 실행시켜보겠습니다.
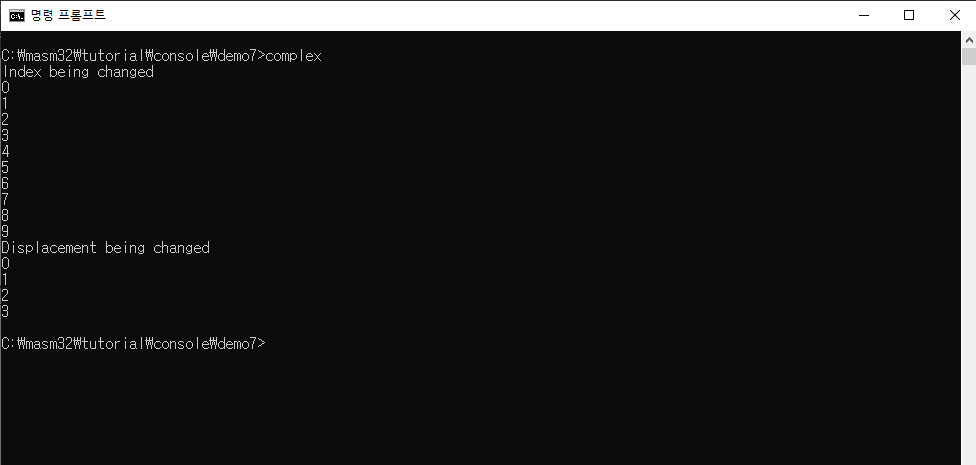
잘 출력이된것을 볼 수 있습니다.
이제 MASM의 튜토리얼을 맞췄으니, 어셈블리어 책을 읽으면서 이해한 부분들을 실습을 통해 몸에 익혀보도록 하겠습니다.
'Programming > Assembly' 카테고리의 다른 글
| Assembly 언어 공부 - 11(덧셈, 뺄샘) (0) | 2022.05.31 |
|---|---|
| Assembly 언어 공부 - 10(어셈블리어의 기본요소) (0) | 2022.05.29 |
| Assembly 언어 공부 - 8(demo4) (0) | 2022.05.26 |
| Assembly 언어 공부 - 7(demo2,demo3) (0) | 2022.05.24 |
| Assembly 언어 공부 - 6(tutorial-demo1) (0) | 2022.05.23 |


