외로운 Nova의 작업실
안드로이드 앱 프로그래밍 - 19(내비게이션 뷰 - 드로어 화면 구성) 본문
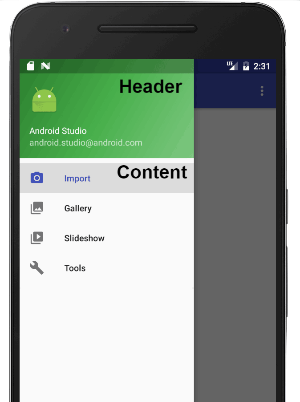
- 내비게이션 뷰
드로어에는보통 메뉴항목을 나열하는 형태로 구성합니다. 그리고 메뉴를 클릭했을때 이벤트를 처리하게됩니다. 이러한 부분을 쉽게 구현하기위해 안드로이드x는 내비게이션뷰를 제공해줍니다. 네비게이션 뷰의 구성은 아래와 같습니다.
- activity_main.xml
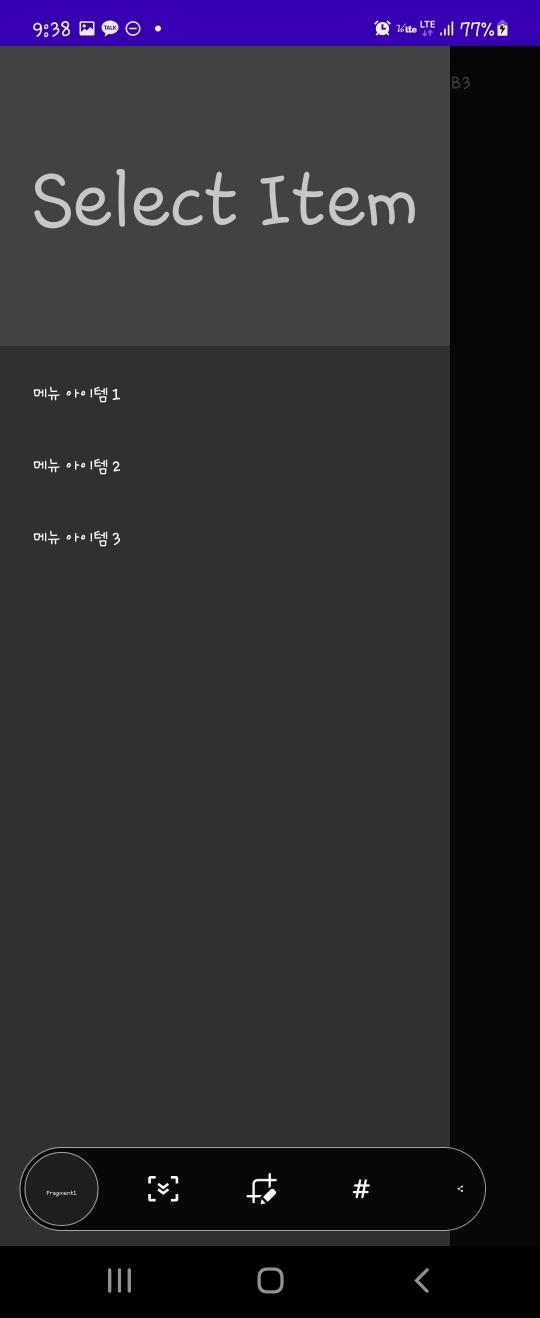
드로어 레이아웃을 잡아주시고 첫번째태그(본 화면에 나올 화면)는 이전에 탭화면을 구성한 화면으로 놔두고 두번째 화면(드로어 화면)은 navigation_header와 menu를 따로 xml파일을 만들어 연결해주었습니다.
<?xml version="1.0" encoding="utf-8"?>
<androidx.drawerlayout.widget.DrawerLayout xmlns:android="http://schemas.android.com/apk/res/android"
    xmlns:app="http://schemas.android.com/apk/res-auto"
    xmlns:tools="http://schemas.android.com/tools"
    android:layout_width="match_parent"
    android:layout_height="match_parent"
    tools:context=".MainActivity"
    android:id="@+id/drawer">
    <LinearLayout
        android:layout_width="match_parent"
        android:layout_height="match_parent"
        android:orientation="vertical">
        <com.google.android.material.tabs.TabLayout
            android:layout_width="match_parent"
            android:layout_height="wrap_content"
            android:id="@+id/tabs"/>
        <FrameLayout
            android:layout_width="match_parent"
            android:layout_height="match_parent"
            android:id="@+id/tabContents"/>
    </LinearLayout>
    <com.google.android.material.navigation.NavigationView
        android:layout_width="300dp"
        android:layout_height="match_parent"
        android:id="@+id/main_drawer"
        app:headerLayout="@layout/navigation_header"
        app:menu="@menu/menu_nevigation"
        android:layout_gravity= "start"/>
</androidx.drawerlayout.widget.DrawerLayout>
- navigation_headere.xml
<?xml version="1.0" encoding="utf-8"?>
<LinearLayout xmlns:android="http://schemas.android.com/apk/res/android"
    xmlns:app="http://schemas.android.com/apk/res-auto"
    android:layout_width="match_parent"
    android:layout_height="200dp"
    android:background="@color/cardview_dark_background"
    android:gravity="center"
    android:orientation="vertical"
    android:theme="@style/ThemeOverlay.AppCompat.Dark">

    <TextView
        android:id="@+id/text"
        android:layout_width="wrap_content"
        android:layout_height="wrap_content"
        android:text="Select Item"
        android:textSize="50dp" />

</LinearLayout>
- menu_navigation.xml
<?xml version="1.0" encoding="utf-8"?>
<menu xmlns:android="http://schemas.android.com/apk/res/android">
    <item
        android:id="@+id/menu_item1"
        android:title="메뉴 아이템 1" />
    <item
        android:id="@+id/menu_item2"
        android:title="메뉴 아이템 2" />
    <item
        android:id="@+id/menu_item3"
        android:title="메뉴 아이템 3" />
</menu>
- MainActivity.kt
이전에 탭화면과 같이 드로어를 구성했습니다. 드로어 아이템 클릭시 콜백함수는 setNavigationItemSelectedListener 입니다.
package com.example.test

import android.os.Bundle
import android.text.method.ScrollingMovementMethod
import android.util.Log
import androidx.appcompat.app.ActionBarDrawerToggle
import androidx.appcompat.app.AppCompatActivity
import com.example.test.databinding.ActivityMainBinding
import com.google.android.material.tabs.TabLayout
import com.google.android.material.tabs.TabLayout.Tab


class MainActivity : AppCompatActivity() {
    override fun onCreate(savedInstanceState: Bundle?) {
        super.onCreate(savedInstanceState)
        val binding = ActivityMainBinding.inflate(layoutInflater) //activity_main_xml 파일의 객체들을 가져옵니다.
        setContentView(binding.root) //activity_main_xml을 화면에 출력합니다.

        //메뉴아이템 이벤트 핸들러
        binding.mainDrawer.setNavigationItemSelectedListener {
            Log.d("Nova", "good choice ${it.title}")
            true
        }

        //탭버튼 정의
        val tab1: TabLayout.Tab = binding.tabs.newTab()
        tab1.text = "Tab1"
        binding.tabs.addTab(tab1)

        val tab2: TabLayout.Tab = binding.tabs.newTab()
        tab2.text = "Tab2"
        binding.tabs.addTab(tab2)

        val tab3: TabLayout.Tab = binding.tabs.newTab()
        tab3.text = "Tab3"
        binding.tabs.addTab(tab3)

        //탭 버튼 이벤트 처리
        binding.tabs.addOnTabSelectedListener(object : TabLayout.OnTabSelectedListener{
            //탭버튼 선택할때 이벤트
            override fun onTabSelected(tab: Tab?) {
                val transaction = supportFragmentManager.beginTransaction()
                when (tab?.text) {
                    "Tab1" -> transaction.replace(R.id.tabContents, fragementOne())
                    "Tab2" -> transaction.replace(R.id.tabContents, fragementTwo())
                    "Tab3" -> transaction.replace(R.id.tabContents, fragementThree())
                }
                transaction.commit()
            }
            //다른탭을 눌러 선택된 탭 버튼이 해제될때 이벤트
            override fun onTabUnselected(tab: Tab?) {

            }
            //선택된 버튼을 다시 선택할때 이벤트
            override fun onTabReselected(tab: Tab?) {

                }

        })

    }
}
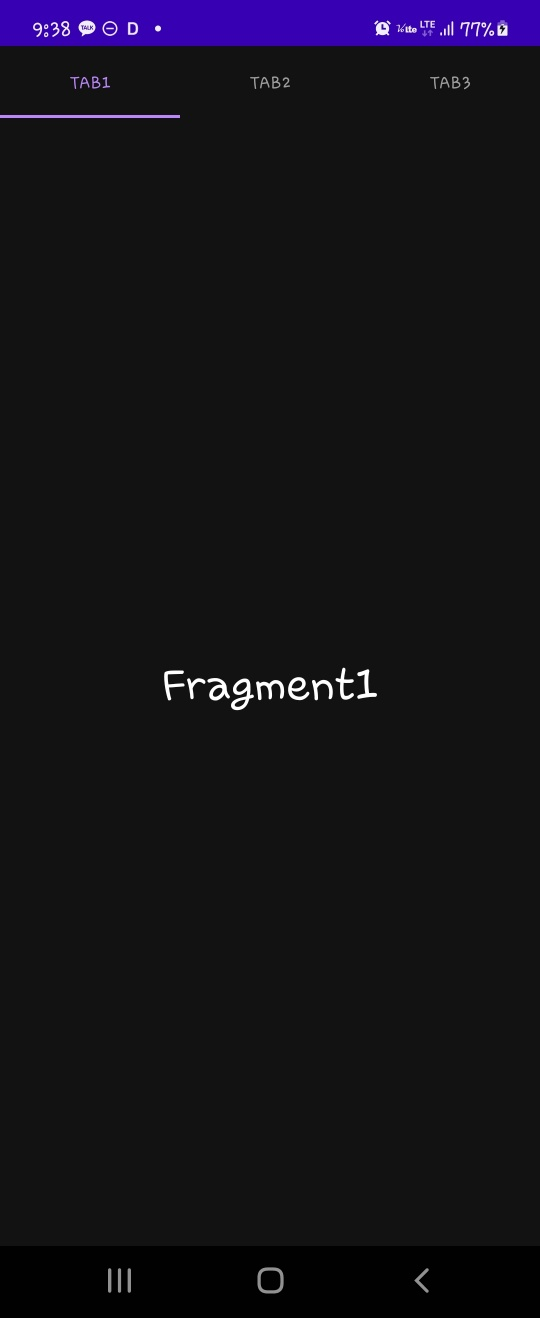
- 실행 화면
'Programming > Kotlin - Android' 카테고리의 다른 글
| 안드로이드 앱 프로그래밍 - 21(인텐트 이해하기) (0) | 2023.02.07 |
|---|---|
| 안드로이드 앱 프로그래밍 - 20(확장된 플로팅 액션 버튼) (0) | 2023.02.06 |
| 안드로이드 앱 프로그래밍 - 18(탭레이아웃 - 탭버튼 구성) (0) | 2023.01.30 |
| 안드로이드 앱 프로그래밍 - 17(머터리얼 라이브러리) (0) | 2023.01.27 |
| 안드로이드 앱 프로그래밍 - 16(제트팩 라이브러리 - 드로어 레이아웃) (0) | 2023.01.26 |
'Programming/Kotlin - Android' Related Articles
more


Comments